The Dawn of the Door!
The Dawn of the DOOR!
This blogpost will be about posting my journey, working on the "Door" Project from the NextGen Level 3 Games, VFX & Animation Curriculum. Firstly we had to grasp during induction week, we had to take inspirations by searching some themed doors & posting them on a moodboard. I went with a combination of Sci-fi & medieval & Church doors. In that moodboard, I've also discussed the likes & dislikes about each one.


In order to make our own door design, we had to draw some concept art for the doors; as you can see, I drew various design ideas & changes (apologies for the unclear copies, the printer couldn't pick up the pencil outlines!)


From the snippets of my moodboard, I've decided to combine both elements of medieval/church doors & Sci-Fi doors for my Door Project. My final design I went with is the design on the 2nd image on the bottom left. I felt that had perfectly combined elements of both Sci-Fi & Medieval church. In Blender, the free open-source, 3D Animation software, I added a cube mesh and scaled it down to model the actual doors.


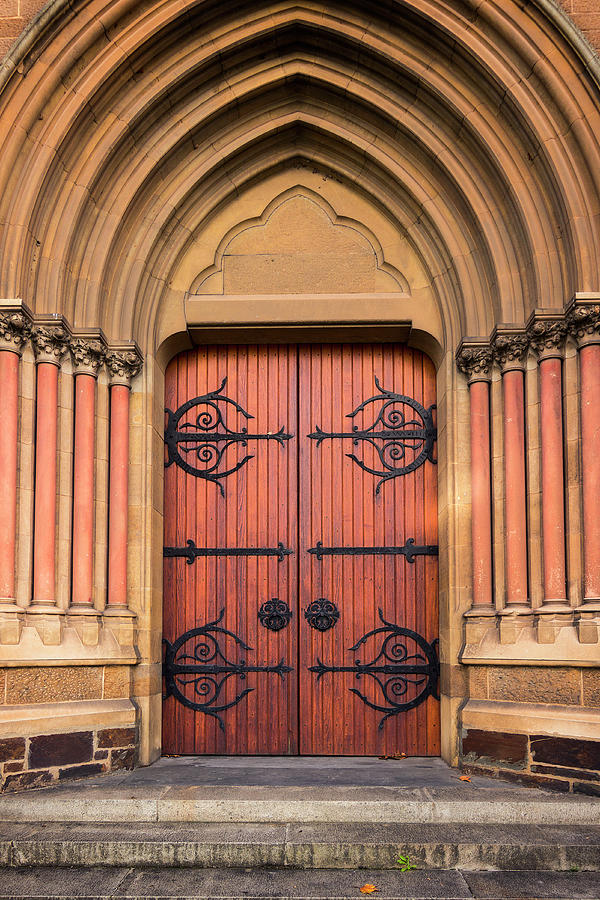
I applied an Array modifier to give it that that layered approach to the overall structure of the doors. This is more present in church doors
Reference
My Attempt

I used cylinder meshes to replicate pipes. Though they do look big, I'm trying to replicate huge pipes with wires inside. I extruded them and rotated as I went along with modelling the cables/pipes.

I then moved on to modelling the number pad at the side, I didn't make the design to complicated but, I did take some inspiration. One of them being that the number pads buttons, I took inspiration from an ATM number pad.

However I did grab photos of various number pads and posted them in my moodboard.

This is what my number pad looks like: 
I used a cube mesh, scaled it down into a small cuboid, then I used the inset setting, and I pushed the face of the inset down. For the buttons, I used another cube mesh, scaled it down into a small, small cuboid & I duplicated it 8 times.
Learning to Animate my Doors
Using my knowledge that I've learned from the Blender Guru tutorials & from Max's lesson, I used the timeline at the bottom of the UI, dragged it up so I can see it better, and made some keyframes to animate my two doors. Before I even considered animating them, I looked at some GIFs & videos of bus doors opening & closing as I felt it would be suitable for my doors to open that way.

The way that bus doors opened was my main inspiration of how my door was going to open & close. To me, it gave me that old yet, slightly futuristic movements to it. So, I decided to go on with animating a similar sort of style to my doors.
To animate using keyframes in blender you create your first keyframe, by pressing I, then a dropdown menu will come up. Then click on Location, Rotation & Scale. And you have your first keyframe set up. Then, drag the playhead a few frames ahead but, before you make your second keyframe, I rotated one of my doors and then I created a keyframe. The reason why you have to do it in this order is so that Blender saves your animation changes.
This is what my doors look like when fully animated:I used the "bounce" preset in interpolation mode to give it a more authentic feel to how the doors move. As bus doors sometimes collide with the frame of the bus and it bounces a bit.
How I textured my Doors
When I began to texture my doors, it was around the time when the "Door Project" was due. I was in a huge panic and, rushed everything. So, before doing anything, and before the deadline was coming closer & closer, I learnt how to UV Unwrap my doors. UV Unwrapping was a "pain in the backside" process so, I will not be explaining it fully in this blog however, here's a brief explanation;
I went into "Edit Mode" in Blender and, went into "edge select" mode. This means that you can select the edges of your mesh in edit mode. I've marked seams in parts of my mesh to form a net, this can help with the textures as they'll align properly. You have to be in the UV Editing viewport. This is specifically used for UV Unwrapping. When UV Unwrapping my meshes, it will appear in the UV Editing viewport like this:

The blue geometry in the left hand side are called "islands". When you selected your UV Unwrapped mesh, it will appear on the left hand side.
After UV Unwrapping all of my meshes which make up my door, I had to arrange all the islands in a certain way so that all the meshes fit into the UV grid. It's a sort of similar way flatpack furniture are packaged. It can make texturing it easier.
This is how I arranged the islands on the UV Grid:

Next, I exported the UV Map as a .png image file in Blender. Then I opened the png file in photoshop. This is when the official texturing process begins and I was getting close to the deadline and I panicked. I did have a few colour schemes in mind as well as implementing some iron brackets which were more common in medieval & church doors: 
At the time I wanted to implement the iron brackets on my door model as it perfectly balances the combination of sci-fi & medieval designs. But due to pressure of time, I didn't have time to implement them. So, I quickly moved on to texturing my doors.
For texturing, I used photoshop and using the hard tool brush, I textured them.
This is how I did my textures:

As mentioned before, I used photoshop to texture the doors. However, before starting anything, I had to import the UV Map of my doors (which I exported as a png file in Blender) into photoshop. This is key because if you simply colour the canvas, export it as a png, import the png in Blender, Blender will texture it but, it won't be arranged the way you want the textures to be arranged. So, making a UV Map & using it in photoshop can be useful. Then, I created a clipping mask so, that the colour doesn't overlap the UV Map & collide with the other colours I've used. After that, I simply coloured them in using the brush tool. I used a "Stained Glass" image texture for the windows & I roughly cropped the excess out.
After the colouring process has finished, I exported the photoshop file as a png and, dragged the png file into the Shading vewport in Blender.

The blue arrow is the exported texture file. As you can see, from using the UV Map to help us colour, Blender assigned the textures to the correct meshes fairly well.
Here's a proper render of what my door looks like.

Conclusion
In Conclusion, I think the "Door" project went okay for the most part. There were some difficult processes such as UV Unwrapping, but there were some processes which I enjoyed such as modelling my doors and texturing them. If I had more time in working on this project. I would've modelled some iron brackets to the doors to balance out the combination of medieval/church doors & Sci fi. Also, I would've textured my doors a bit more thoroughly since I used basic colours to texture my doors. Also, I rushed the texturing process and now have missing spots on my doors:

What I'll do next time is when I work on my next project & when I begin to blog about it, I'll make sure that I log everything which I do so, I can explain it properly in my next blog.
But overall, this "Door" project went fairly okay. I just wished I had more time on this project.


Comments
Post a Comment